Members can also use their 2log account to pay for products. For this purpose, there is the so-called “tally sheet”, which implements a simple payment system in the form of a self-service terminal.
Whether drinks, snacks or materials. It is up to you which products you offer. With the simple product management you keep the prices always up to date and have an exact overview of what was sold in which period.
1 - Manage Products and Prices
Learn how to add products and manage prices
2log offers a simple product management. With it you can add products, group them into categories, manage prices and assign booking codes. Log in to the 2log Admin Portal and click on the “Products” tab.
Attention!
Note that the product names cannot be changed afterwards! This decision was made to prevent errors in the sales statistics. So make sure to name the products correctly and unambiguously.
The mysterious Checkbox
The checkbox activates the corresponding product for the tally list. This can be used to hide products that are temporarily unavailable.
Category
The product category is only a logical grouping to increase the clarity, so that the desired product is found faster. In the tally list, a separate tab is displayed for each category. The category has no influence on the billing.
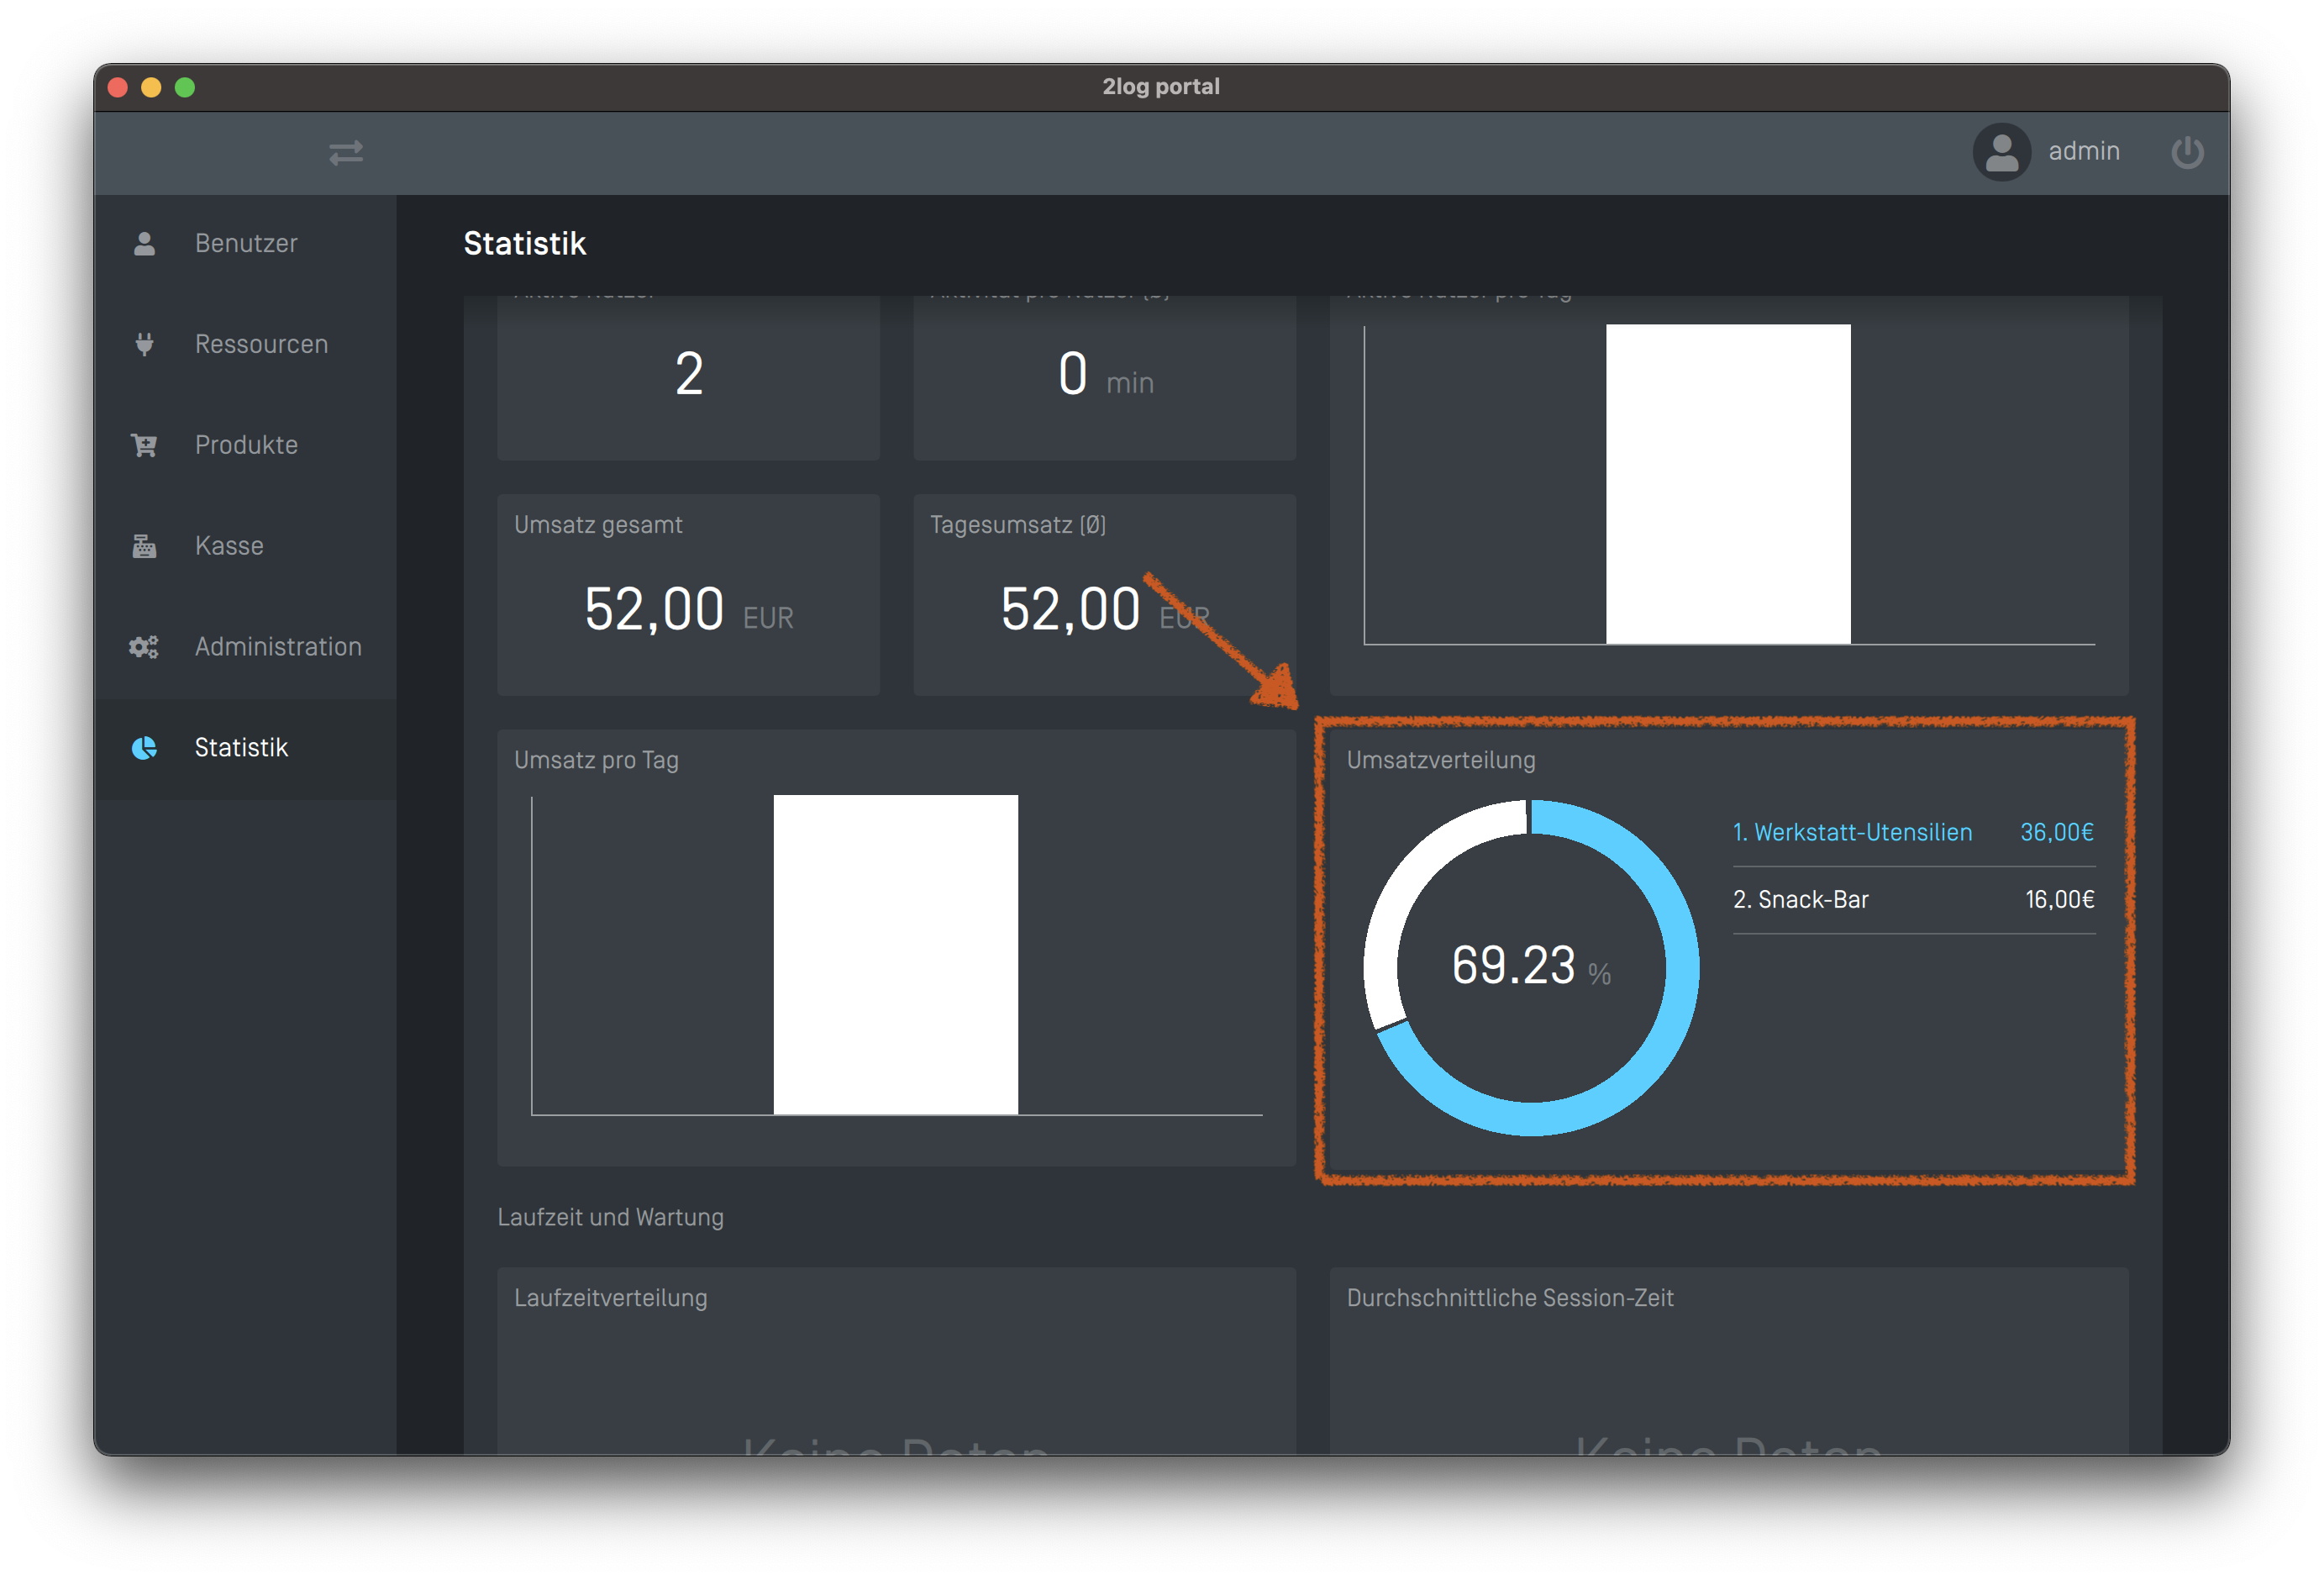
Accounting Code
The booking code is taken into account in the statistics and is used to distribute the revenue to different positions.
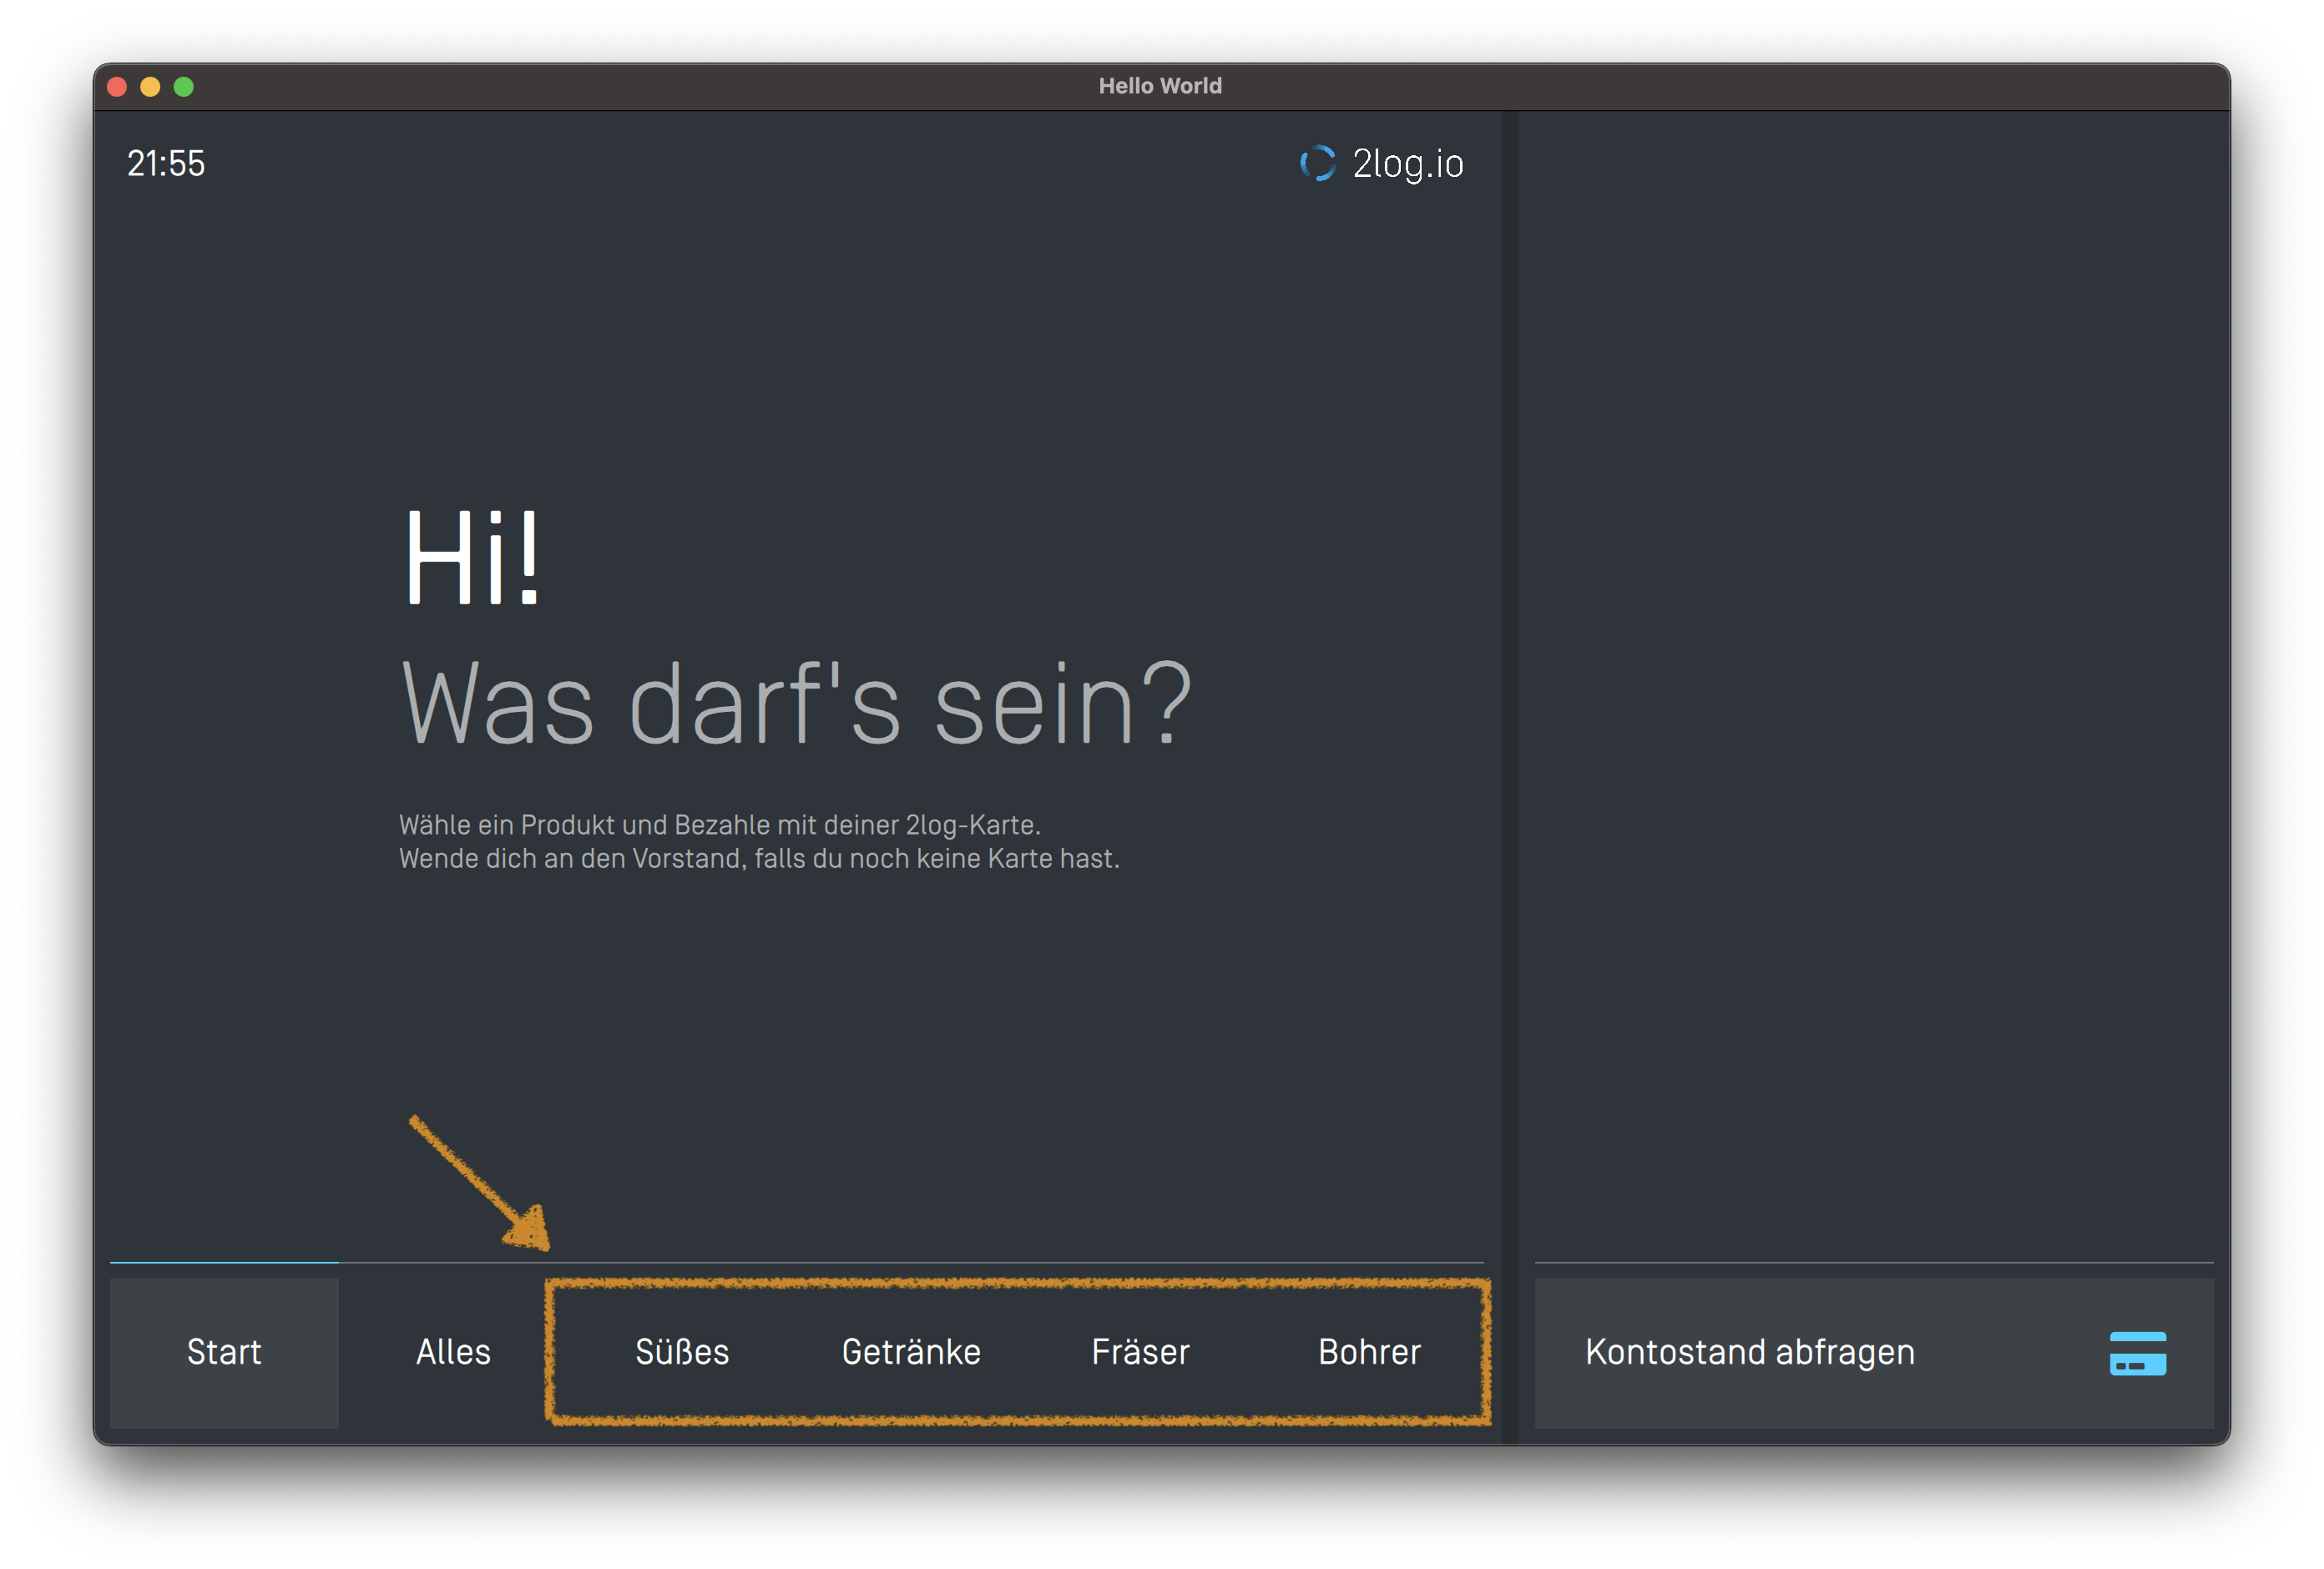
2 - The 2log.io Tally Sheet
Here you will learn how to set up the 2log tally sheet
The 2log tally sheet is a graphical interface for billing all kinds of products in the style of a self service vending machine. The products offered can be managed centrally via the 2log.io user interface. The products can be paid either with the 2log card or the 2log App by scanning a QR code.
Prepare the Device
The 2log tally sheet runs on all major platforms, if you compile it yourself. Especially single board computers like the Raspberry Pi are a good choice. The easiest way to set up the 2log tally sheet is on a 7" or 10" Android tablet.
Android
This is by far the easiest way to set up the tally sheet:
Just download the APK from here and install it on your tablet.
RaspberryPi
A Raspberry Pi Zero is perfectly sufficient. In the Gitlab repository there are DXF milling files for a nice case. For compiling the sources for the raspberry pi, you can use the docker based cross toolchains.
Pair the Device
The first time you start the app, you must enter the host address of the 2log server.
Log in to the 2log.io admin interface. Switch to the “Administration” tab and open the “Device Explorer” via the button in the top right corner.
The device should now appear under “new devices”. Click on the “+” and assign an address to the device.
Configuration
The SelfService Terminal can be configured via the DeviceExplorer. Depending on the resolution and screen diagonal, it may make sense to set parameters such as the size of the tiles or the font size. Make sure you have added a few products so you can better judge the appearance.
Visual Appearence
You can access the settings via the Device Explorer in the administration area. Just click on the terminal and change the parameters labelFontSize, maxCellWidth and priceFontSize. After clicking on “Send”, the changes are directly transferred to the device and are immediately visible.
Assign a Dot
In order for users to be able to pay with their RFID card later, you need a 2log Dot. The Dot can be assigned to the tally sheet via the 2log admin interface.